Enable GPUs & CPUs Quotas
To use GPUs and CPUs instances in Brender Studio, you need to make sure you have the necessary quotas in your AWS account.
Understand AWS Quotas
AWS has quotas for each service that limits the resources you can use. It is important to understand these quotas to avoid issues when running your jobs.
Quotas in AWS represent the limits applied to AWS resources, including EC2 instances, among others. These quotas determine the amount of resources you can use in your account. AWS sets these default limits to prevent excessive spending, especially considering that GPU instances, such as the G5, can be costly.
To use instances with GPUs and CPUs, such as NVIDIA G5 or instances with a high number of vCPUs, it is essential to have sufficient quotas. This ensures that there are no interruptions during the rendering process due to a lack of resources.
Quotas for Instances
The quotas for instances vary depending on the type of server you choose to use:
- On-Demand:
- This type requires a quota for instances that are used on demand. Although these instances have a higher cost, they are always available when you need them.
- Spot:
- This type requires a quota for instances that are used when there is surplus capacity in the market. They are generally cheaper, but can be interrupted if demand increases.
Quotas for On-Demand and Spot Instances
It is important to note that the quotas for On-Demand and Spot instances are independent. Therefore, if you plan to combine both types of resources in your rendering process, you must ensure you have sufficient quotas for both.
Importance of Verifying and Requesting EC2 Quotas
To use Brender Studio optimally and make the most of the resources available in your Blender Farm, it is crucial to verify your current quotas and request an increase if necessary. This is especially important for users registering for the first time with AWS or those who have not yet increased their quotas for AWS EC2 instances.
To verify your current quotas and request an increase, follow these steps:
- Access Brender Studio.
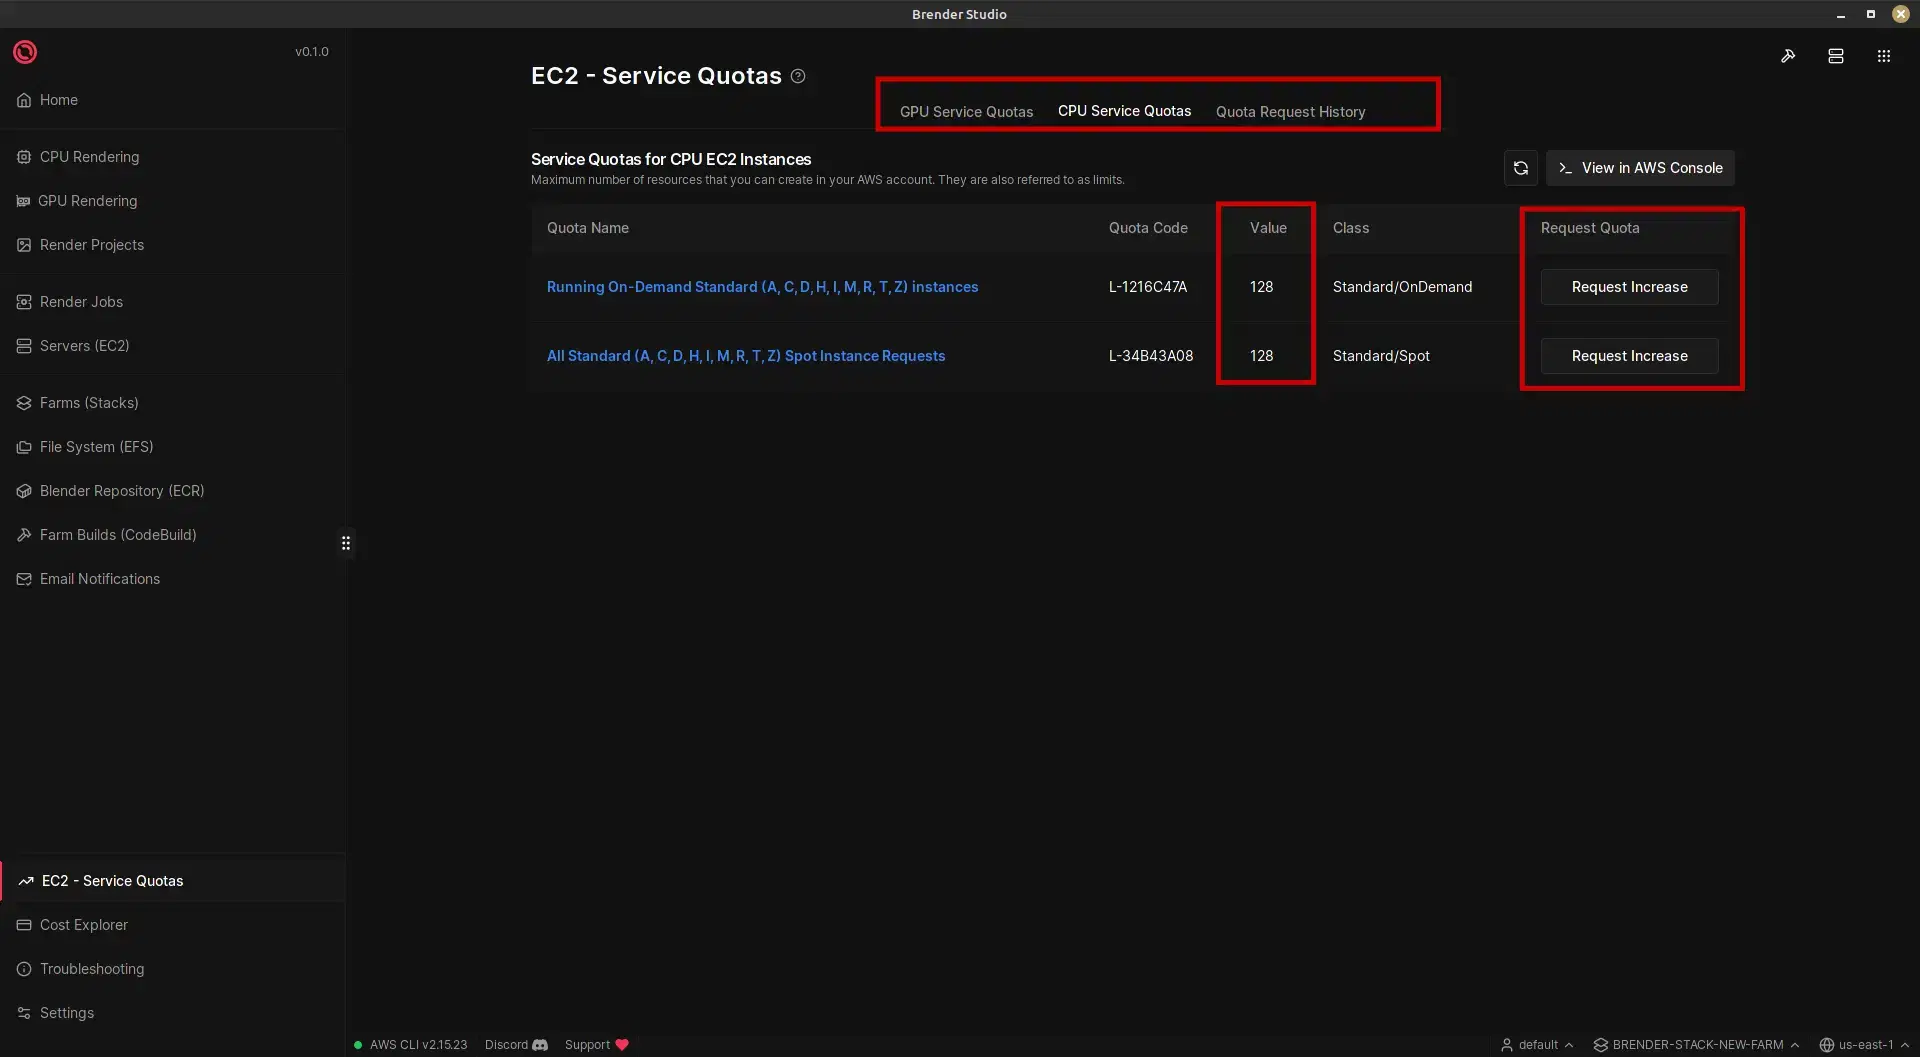
- Go to the EC2 - Service Quotas section.
- In the panel section, you will find tabs labeled GPU SERVICE QUOTAS, CPU SERVICE QUOTAS, and Quota Request History.
- Select the tab you want to verify.
- In the table, the current quota values will be shown in the Value cell.
- Review your current quotas and request an increase if necessary.
Do you have insufficient quotas?
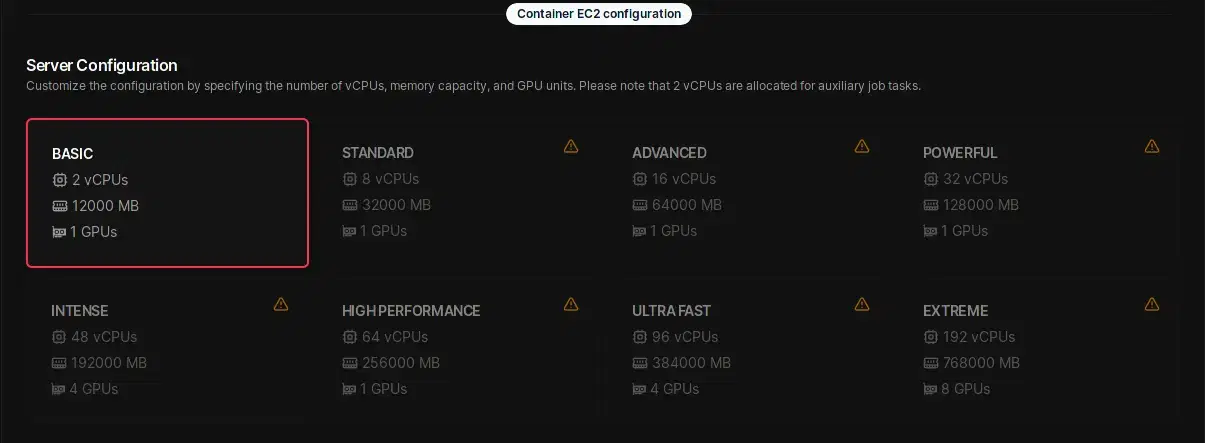
If you do not have sufficient quotas for EC2 instances when configuring your rendering job, you may face limitations in the available vCPU and GPU options. Options that exceed your current AWS quota will be blocked and identified with a yellow warning triangle. Therefore, it is advisable to request a quota increase to be able to use all the instance types available in Brender Studio and avoid interruptions in your workflow.
Example of options blocked in the render form due to insufficient quotas.
Request Increase Quotas
If you need more quotas, you can request an increase directly from Brender Studio. Here’s how to do it:
Increase CPU/GPU Quota
- Access Brender Studio.
- Go to the EC2 - Service Quotas section.
- In the panel section, you will find tabs labeled GPU SERVICE QUOTAS, CPU SERVICE QUOTAS, and Quota Request History.
- Select the tab CPU SERVICE QUOTAS or GPU SERVICE QUOTAS depending on the quota you want to increase.
- Identify the type of instance for which you want to increase the quota (Spot) or (On Demand).
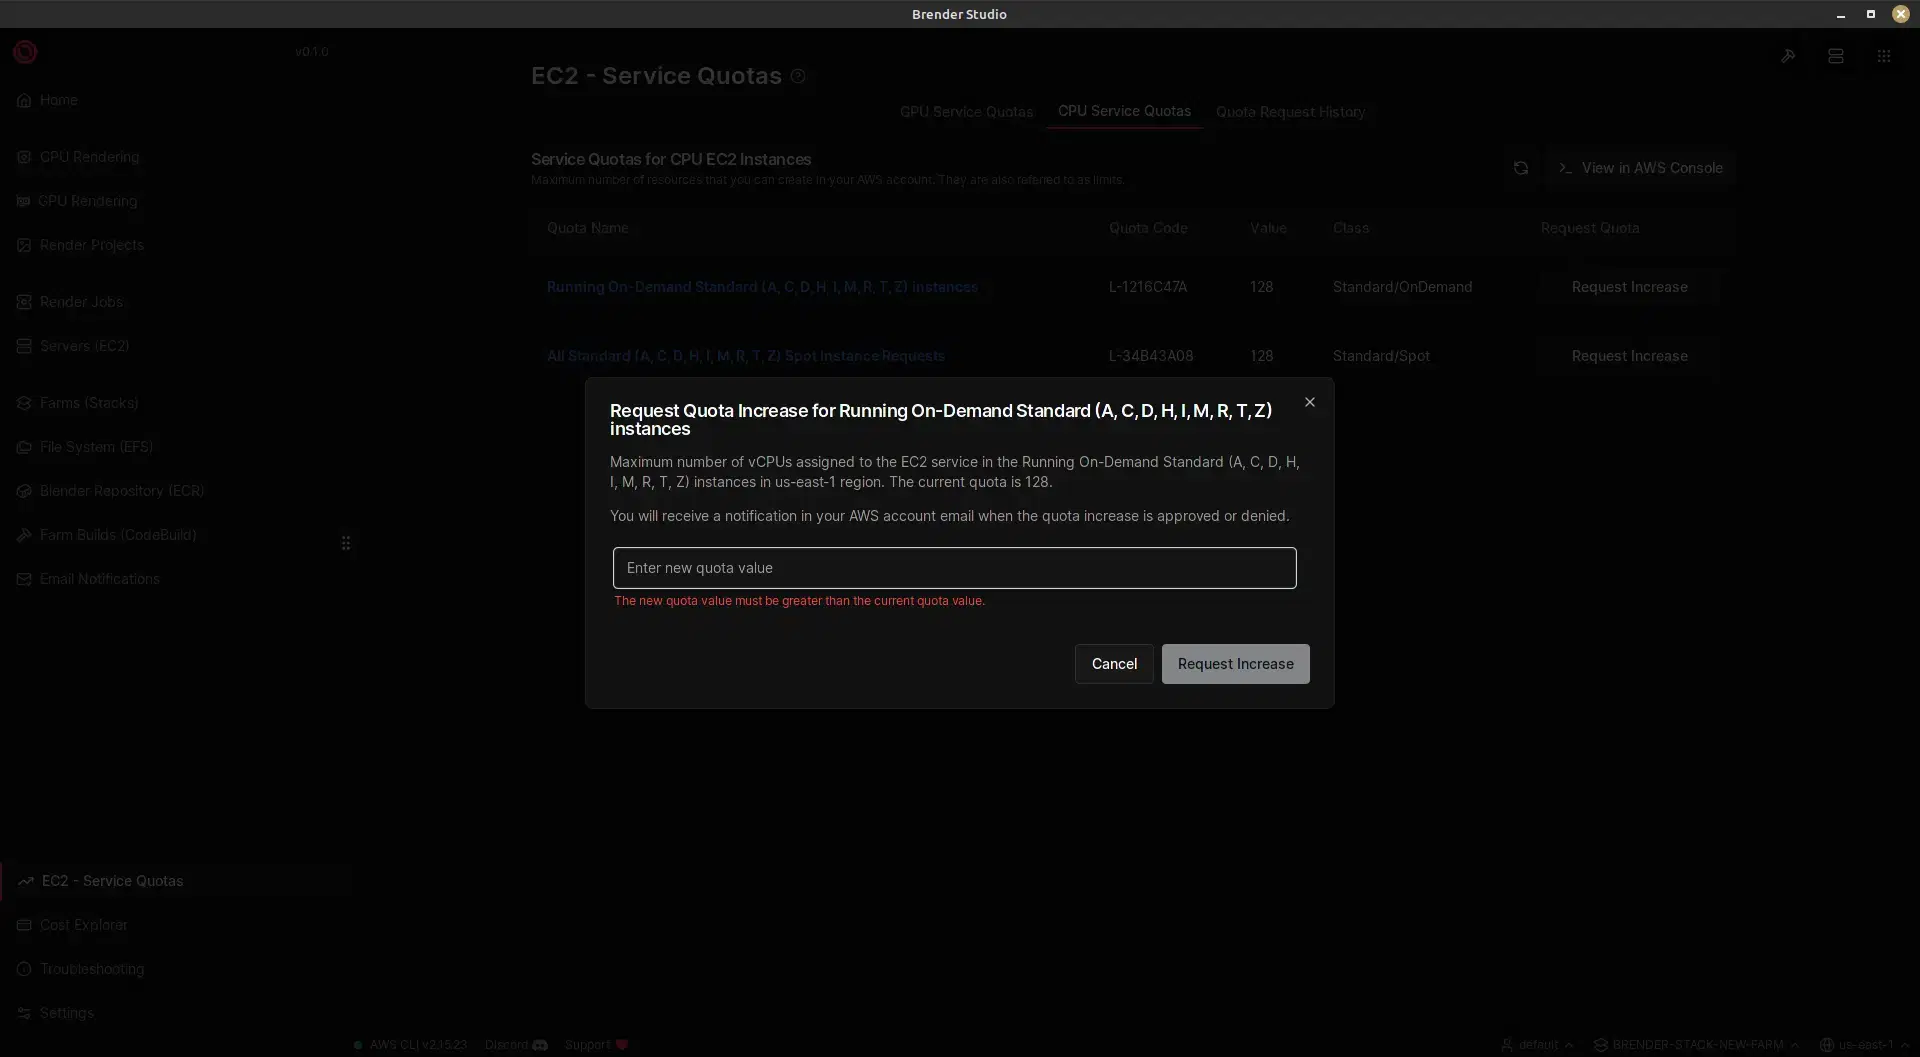
- Click on the Request quota increase button.
- Enter the new quota value.
Request Increase Time
The required duration to process a quota increase request may vary depending on the type of quota and the specific region. In some cases, this process could extend up to a full week, depending on the Amazon team responsible for reviewing your request. Following their review, they will email you explaining their decision, whether they accepted or rejected your request, along with their rationale.
Check Quota Increase Status
After you request a quota increase, you can check the status of your request by following these steps:
- Access Brender Studio.
- Go to the EC2 - Service Quotas section.
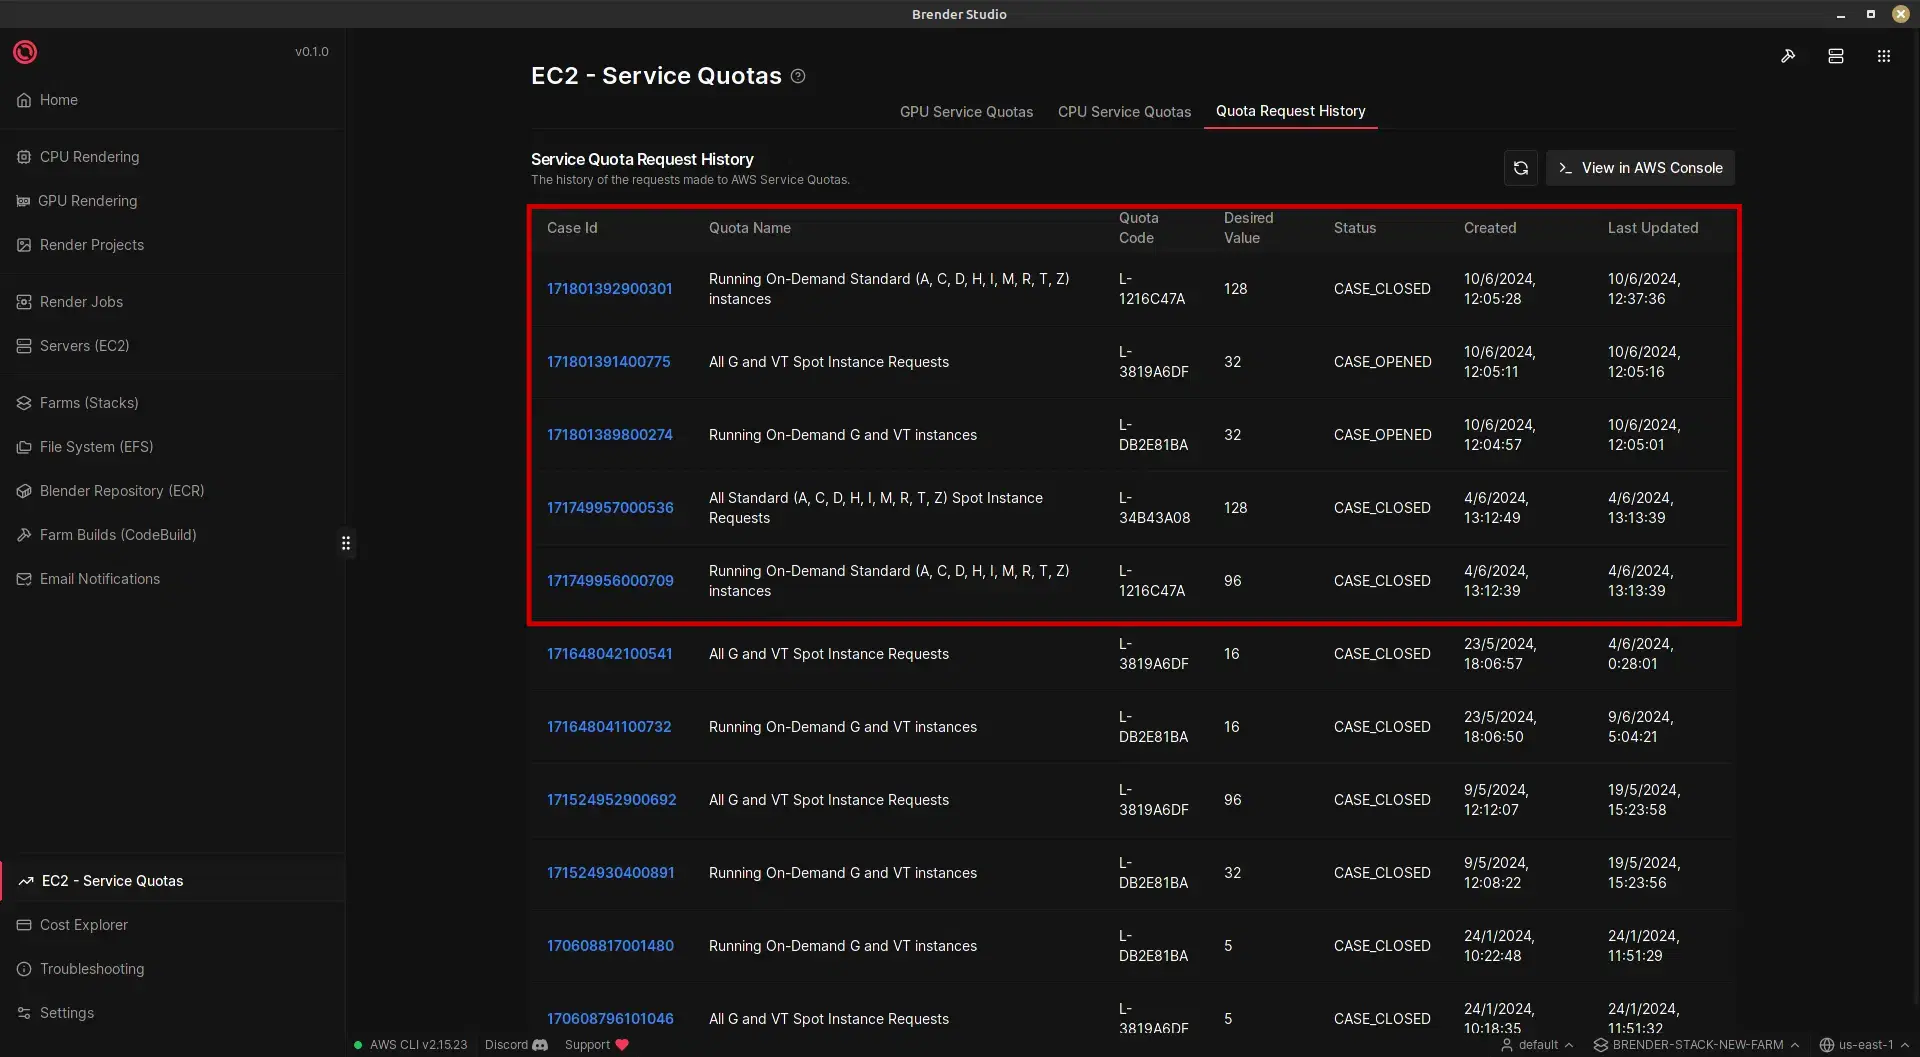
- Select the tab Quota Request History.
- Check the status case of your request. The status can be:
- CASE_OPENED: When the request is still under review.
- CASE_CLOSED: When the request has been resolved.
Check Quota Increase Status
The "open" or "closed" status case does not indicate whether your request was accepted or not. It simply denotes whether the case is in progress or has been resolved. If the case has been closed, check the email you received to find out if it was accepted or rejected, along with the reason provided.